


Hey there, fellow gardening and landscaping enthusiasts! If you're looking to give your outdoor space a clean, polished look, metal landscape edging is the way to go. I'm a supplier of top - notch metal landscape edging products, and today, I'm going to walk you through the process of installing it.
First off, let's talk about why metal landscape edging is so great. It's durable, long - lasting, and can withstand all kinds of weather conditions. Whether you're dealing with scorching summers or freezing winters, metal edging will keep its shape and continue to look good. Plus, it gives your garden beds, walkways, and other landscape features a sharp, defined border.
Step 1: Planning Your Project
Before you start digging and installing, you need to have a clear plan. Decide where you want to place the metal landscape edging. Maybe you want to edge a flower bed, a vegetable garden, or a pathway. Take a good look at your outdoor space and mark the area with stakes and string. This will help you visualize the shape and size of the edging you'll need.
Measure the length of the area you're edging. This is important because you'll need to buy the right amount of metal edging. You don't want to run out in the middle of the project or have a bunch of extra pieces lying around. When you're measuring, be as accurate as possible. Add a little extra length to account for any curves or bends in the area.

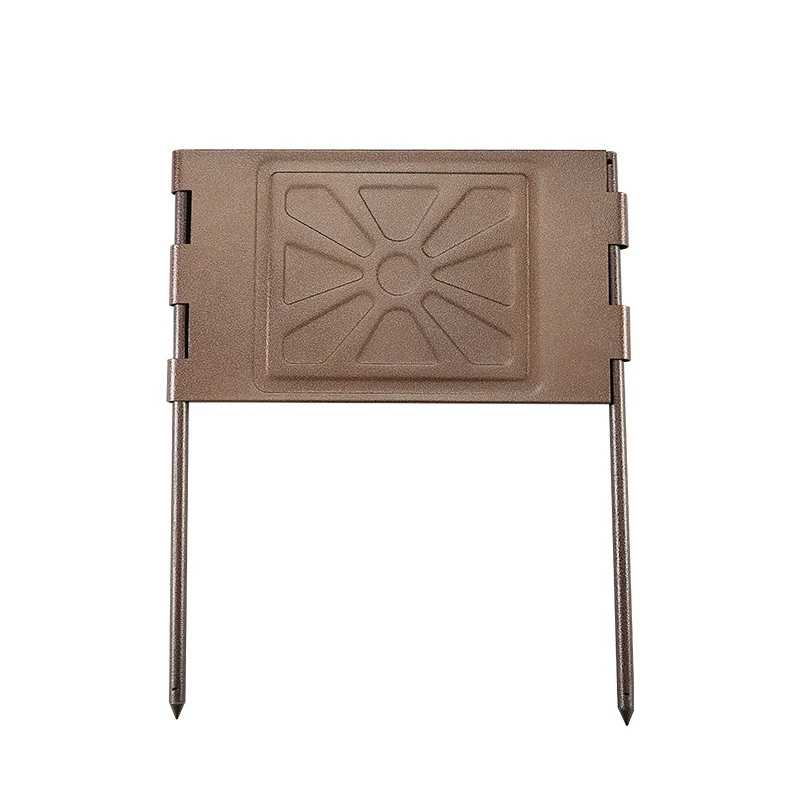
Step 2: Choosing the Right Metal Landscape Edging
There are different types of metal landscape edging available, and the choice depends on your specific needs and preferences. If you're looking for a classic and sturdy option, check out our Metal Landscape Edge. It's made from high - quality metal that can handle a lot of wear and tear.
For those who are into raised garden beds, our Steel Raised Garden Bed Edging is a great choice. It provides a strong border for your raised beds, keeping the soil in place and giving your garden a neat appearance.
If you have a vegetable garden, our Metal Vegetable Bed Edging is perfect. It's designed to be safe for growing vegetables and won't rust or corrode easily.
Step 3: Preparing the Ground
Once you have your plan and your edging, it's time to prepare the ground. Start by removing any grass, weeds, or debris from the area where you'll be installing the edging. You can use a shovel or a hoe to do this. Make sure the ground is as level as possible. If there are any bumps or dips, use a rake to smooth them out.
Next, dig a shallow trench along the marked area. The depth of the trench will depend on the type of edging you're using, but generally, it should be about 2 - 3 inches deep. The width of the trench should be slightly wider than the width of the edging. This will give you some room to work and ensure that the edging fits properly.
Step 4: Installing the Metal Landscape Edging
Now comes the fun part - installing the edging! Start by placing the first piece of edging in the trench. Make sure it's straight and level. If you're edging a curved area, you may need to bend the edging slightly. Most metal edging can be bent easily, but be careful not to break it.
Connect the pieces of edging together. Some edging comes with connectors that make it easy to join the pieces. Others may require you to use screws or bolts. Follow the manufacturer's instructions for connecting the edging. As you connect the pieces, keep checking to make sure the edging is still straight and level.
Once you have all the pieces connected, backfill the trench with soil. Use a shovel to fill in the space around the edging, packing the soil down firmly. This will help keep the edging in place and prevent it from shifting.
Step 5: Finishing Touches
After the edging is installed and the trench is backfilled, give your project a final once - over. Make sure the edging is still straight and that there are no gaps between the pieces. If there are any loose ends or rough spots, you can use a file or sandpaper to smooth them out.
You can also add some mulch or decorative stones around the edging to give it a more finished look. This will not only enhance the appearance of your landscape but also help retain moisture in the soil.
Tips and Tricks
- When bending the edging, use a pair of pliers or a pipe bender for better control.
- If you're installing the edging in an area with heavy foot traffic, you may want to use stakes to secure it even more.
- Before you start the project, make sure you have all the necessary tools on hand, such as a shovel, rake, pliers, and a measuring tape.
Conclusion
Installing metal landscape edging is a great way to enhance the beauty and functionality of your outdoor space. With a little planning and the right tools, you can do it yourself and enjoy the results for years to come.
If you're interested in purchasing high - quality metal landscape edging for your next project, we'd love to hear from you. Whether you have questions about the products, need help with measurements, or want to discuss your specific needs, we're here to assist you. Contact us to start the procurement negotiation process. We're confident that our metal landscape edging will meet your expectations and transform your landscape.
References
- "Landscaping for Beginners" - A guidebook on basic landscaping techniques
- Manufacturer's instructions for metal landscape edging products


