


Hey there, fellow gardening and landscaping enthusiasts! I'm a supplier of Metal Landscape Edge, and today I'm stoked to walk you through the process of installing a metal landscape edge. Whether you're a seasoned pro or just starting out with your gardening projects, this guide will help you get the job done right.
Why Choose Metal Landscape Edge?
First off, let's talk about why metal landscape edges are a great choice. Metal edges, like the ones we offer at Metal Landscape Edge, are incredibly durable. They can withstand the elements, from scorching sun to heavy rain and even snow. Unlike some other materials that might rot, warp, or break over time, metal edges will keep their shape and function for years to come.
Another advantage is their versatility. Metal landscape edges come in various styles and sizes, so you can find the perfect fit for your specific project. Whether you're creating a border for a flower bed, a pathway, or a raised garden bed, there's a metal edge that will work for you. For example, our Steel Raised Garden Bed Edging is specifically designed to provide sturdy support for raised garden beds, while our Metal Raised Garden Bed Edging offers a sleek and modern look.
Tools and Materials You'll Need
Before you start the installation process, it's important to gather all the necessary tools and materials. Here's a list of what you'll need:
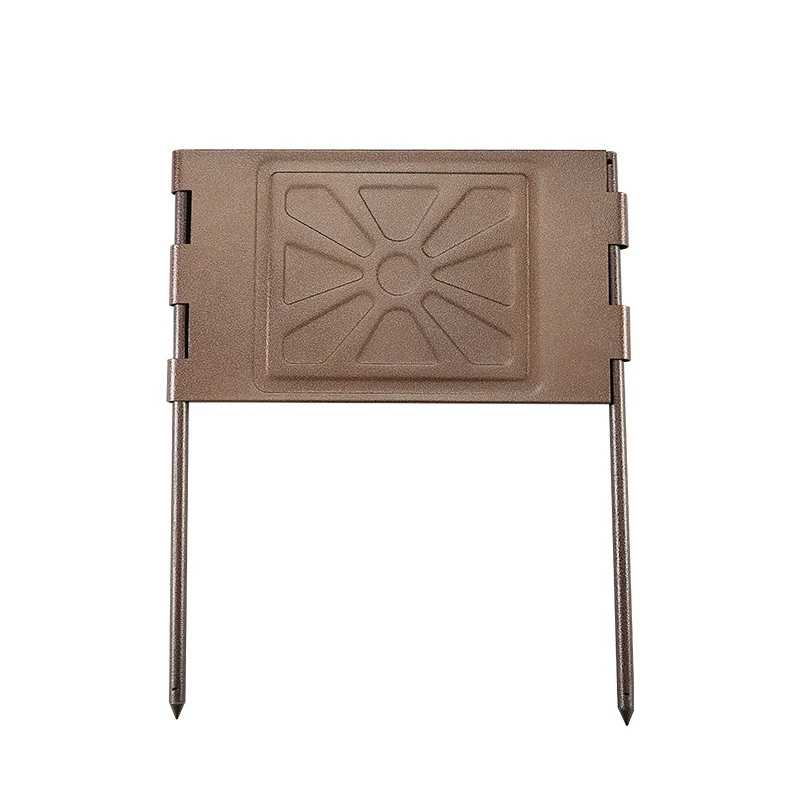
- Metal landscape edge sections: Make sure you have enough to cover the entire perimeter of your project. You can measure the area beforehand to determine the right amount.
- Stakes: These are used to secure the metal edge to the ground. We recommend using metal stakes for maximum durability.
- Hammer or mallet: You'll need this to drive the stakes into the ground.
- Measuring tape: To ensure accurate placement and alignment of the metal edge.
- Utility knife or tin snips: These can be used to cut the metal edge if needed.
- Gloves: Protect your hands from sharp edges and potential injuries.
Step-by-Step Installation Guide
Now that you have everything you need, let's get started with the installation process.
Step 1: Plan Your Layout
The first step is to plan out the layout of your metal landscape edge. Use your measuring tape to mark the perimeter of the area where you want to install the edge. You can use stakes or spray paint to mark the corners and edges. This will help you visualize the final result and ensure that the edge is installed in the right place.
Step 2: Prepare the Ground
Once you have your layout marked, it's time to prepare the ground. Remove any grass, weeds, or debris from the area where the metal edge will be installed. You can use a shovel or a garden hoe to do this. Make sure the ground is level and smooth to ensure a proper fit for the metal edge.
Step 3: Install the First Section
Take the first section of the metal landscape edge and place it along the marked perimeter. Make sure it is aligned properly and that the ends are flush with each other. If the edge needs to be cut to fit, use your utility knife or tin snips to make the necessary cuts. Once the section is in place, drive a stake through the pre-drilled holes in the edge and into the ground. Make sure the stake is firmly secured.
Step 4: Connect the Sections
Continue installing the remaining sections of the metal landscape edge, connecting them together as you go. Most metal edges come with a locking mechanism or a connector that allows you to easily join the sections. Make sure the connections are tight and secure to prevent any gaps or movement. As you install each section, drive a stake through the holes in the edge and into the ground at regular intervals to keep it in place.
Step 5: Bend and Shape the Edge (if necessary)
In some cases, you may need to bend or shape the metal landscape edge to fit around curves or corners. You can use a pair of pliers or a bending tool to carefully bend the edge to the desired shape. Make sure to work slowly and gently to avoid damaging the edge. Once the edge is bent, secure it in place with stakes.
Step 6: Finishing Touches
Once all the sections of the metal landscape edge are installed, take a final look at the layout to make sure everything is aligned and secure. If there are any gaps or uneven areas, you can use a rubber mallet to gently tap the edge into place. You can also add some soil or mulch around the edge to give it a more finished look.

Tips and Tricks
- If you're installing the metal landscape edge on a slope, make sure to start at the bottom and work your way up. This will help prevent the edge from sliding down.
- When cutting the metal edge, wear safety goggles to protect your eyes from flying debris.
- If you're using a hammer or mallet to drive the stakes into the ground, make sure to use a piece of scrap wood or a rubber pad to protect the metal edge from damage.
- If you're installing the metal landscape edge in an area with heavy foot traffic, consider using additional stakes or supports to ensure its stability.
Conclusion
Installing a metal landscape edge is a relatively simple and straightforward process that can greatly enhance the look and functionality of your garden or landscape. By following the steps outlined in this guide and using the right tools and materials, you can achieve professional-looking results in no time.
If you're interested in purchasing metal landscape edges for your next project, we'd love to hear from you. As a trusted supplier of high-quality metal landscape edges, we offer a wide range of products to suit your needs and budget. Whether you're a homeowner, a landscaper, or a contractor, we can provide you with the products and support you need to get the job done right.
So, don't hesitate to reach out to us for more information or to discuss your specific requirements. We're here to help you create the perfect landscape with our durable and stylish metal landscape edges.
References
- Gardening and Landscaping Handbook
- Metal Landscape Edge Installation Manual


